
A DIY natural face mask is a homemade skincare treatment made from organic or food-grade ingredients designed to nourish, hydrate, and improve your skin’s appearance without synthetic chemicals or harsh preservatives. The appeal is real: you control every ingredient, you skip the markup, and you can tailor each batch to exactly what your skin needs right now. Ingredients like raw honey, bentonite clay, colloidal oatmeal, and avocado have dermatology-backed track records for addressing acne, dryness, and inflammation. This guide from Jermaphobi4me covers the best ingredients by skin type, step-by-step preparation, safe storage, and the mistakes that turn a good idea into a skin problem.
Which natural ingredients work best for your skin type?
The right ingredient for a do it yourself face mask depends entirely on your skin’s specific needs. Using the wrong base, even a natural one, can worsen the very problem you are trying to fix.
Oily and acne-prone skin
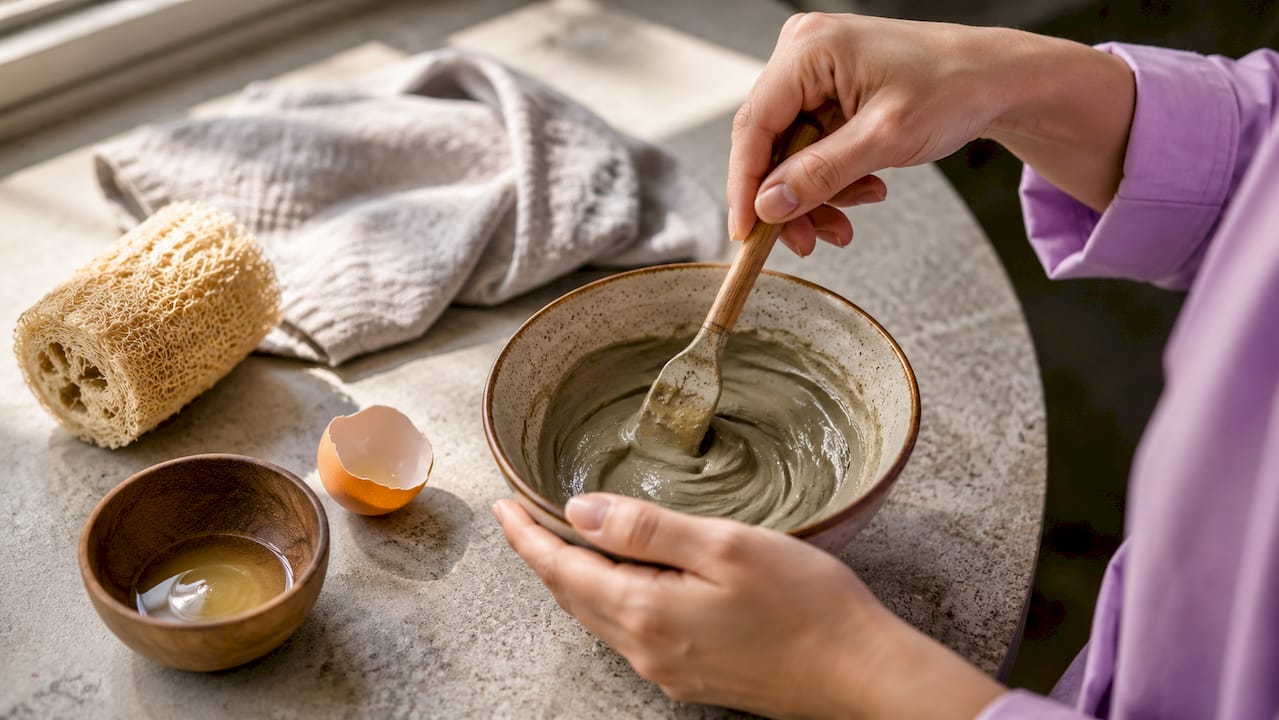
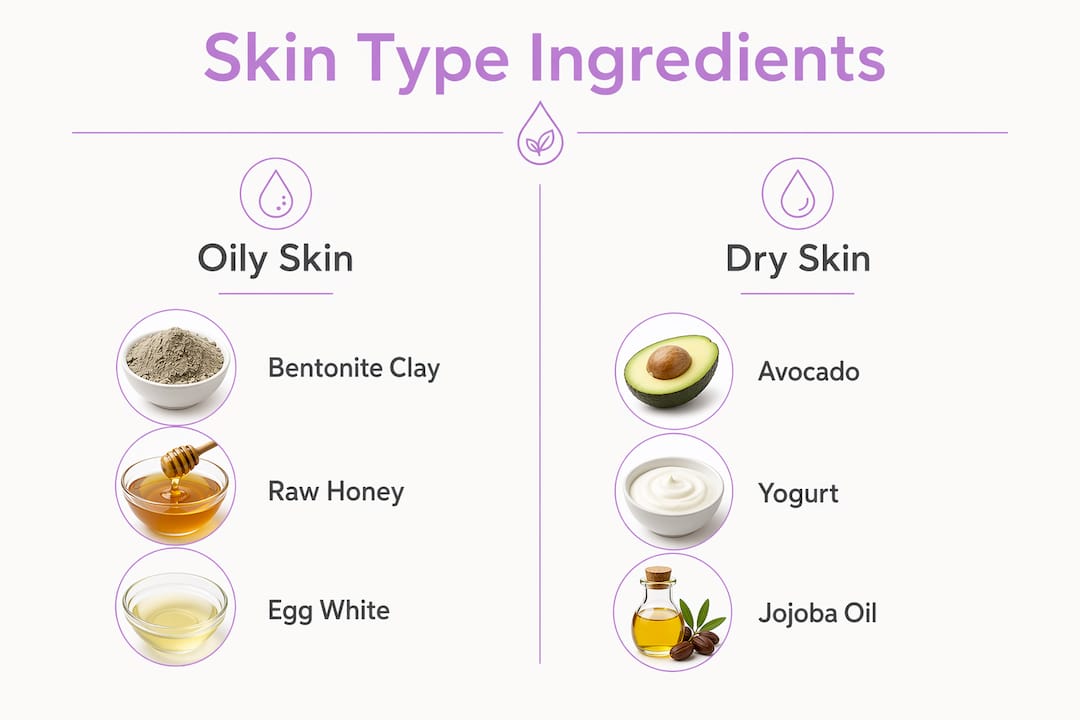
Clay, honey, and egg white are the three workhorses for oily and acne-prone skin. Bentonite clay and kaolin clay both draw out excess sebum and tighten pores without stripping the skin’s moisture barrier. Raw honey adds antibacterial action, which makes it particularly effective for breakout-prone areas. Egg white temporarily tightens skin and reduces the appearance of large pores. A simple mask combining one tablespoon of bentonite clay with one teaspoon of raw honey and a few drops of water gives you all three benefits in one application.
Dry and mature skin
Avocado, plain yogurt, and carrier oils like jojoba or rosehip are the go-to ingredients for dry or mature skin. Avocado delivers oleic acid and vitamins E and K directly to the skin’s surface, which supports repair and deep hydration. Yogurt contains lactic acid, a gentle alpha hydroxy acid that exfoliates dead cells without the harshness of physical scrubs. Honey works here too, acting as a humectant that pulls moisture into the skin. Blend half a ripe avocado with one tablespoon of plain yogurt and one teaspoon of honey for a rich, nourishing organic facial mask.
Sensitive and inflamed skin
Colloidal oatmeal and aloe vera are the two ingredients dermatologists most frequently recommend for reactive or inflamed skin. Colloidal oatmeal forms a protective film over the skin that reduces water loss and calms redness. Aloe vera gel contains polysaccharides and glycoproteins that speed up skin repair and reduce irritation. For a soothing mask, mix two tablespoons of finely ground oats with two tablespoons of pure aloe vera gel and apply immediately. Skip any essential oils in this formula.
Dull and uneven skin tone
Papaya enzymes, turmeric, and vitamin C sources like lemon zest or rosehip powder address dullness and uneven tone. Papain, the enzyme in papaya, dissolves dead skin cells at the surface level without physical abrasion. Turmeric contains curcumin, which has documented anti-inflammatory and brightening properties. Use turmeric sparingly, no more than a quarter teaspoon per batch, because it stains both skin and fabric. A mask of mashed papaya with a pinch of turmeric and one teaspoon of plain yogurt is one of the most effective easy DIY masks for glowing skin you can make at home.
Pro Tip: Always choose raw, unprocessed versions of ingredients like honey and oats. Processed versions have reduced enzyme and nutrient activity, which directly lowers the mask’s effectiveness.
| Skin type | Best ingredients |
|---|---|
| Oily/acne-prone | Bentonite clay, raw honey, egg white |
| Dry/mature | Avocado, plain yogurt, jojoba oil |
| Sensitive/inflamed | Colloidal oatmeal, aloe vera gel |
| Dull/uneven tone | Papaya, turmeric, rosehip powder |
How to prepare and apply a homemade face mask safely
Preparation matters as much as the ingredients themselves. A poorly mixed or incorrectly applied mask can irritate skin even when every ingredient is technically safe.
-
Choose the right tools. Use glass, ceramic, or wooden bowls and spoons. Avoid metal utensils when working with clay masks because metal triggers a chemical reaction that reduces the clay’s drawing power and can introduce unwanted ions to the formula.
-
Patch test before full application. Apply a small amount of the mixed mask to the inside of your wrist or behind your ear. Wait 24 hours. If you see redness, swelling, or itching, that ingredient combination is not right for your skin. Patch testing is non-negotiable, especially when using essential oils or citrus.
-
Check your pH. Professional formulators confirm that skin-compatible pH sits between 5.0 and 5.5. Ingredients that are highly acidic, like undiluted lemon juice, push your skin’s pH out of range and compromise the barrier. Dilute acidic ingredients and test with a basic pH strip if you want to be precise.
-
Apply to clean, dry skin. Wash your face with a gentle cleanser and pat dry before applying any mask. Residual makeup or sunscreen creates a barrier that blocks the mask’s active ingredients from reaching the skin.
-
Spread evenly, avoid the eye area. Use a clean brush or spatula to apply the mask in a thin, even layer. Leave a half-inch margin around your eyes and lips. The skin around the eyes is significantly thinner and more reactive than the rest of the face.
-
Time it correctly. Apply masks for 10 to 20 minutes, two to three times per week. Leaving a mask on longer does not improve results. With clay masks especially, extended wear dries the skin past the point of benefit and can trigger rebound oiliness.
-
Remove with lukewarm water. Rinse thoroughly with lukewarm water and a soft cloth. Follow immediately with your regular moisturizer while skin is still slightly damp to lock in hydration.
Pro Tip: If you want to learn how to prep skin for treatments naturally, proper pre-mask preparation makes every ingredient work harder and reduces the risk of irritation.
How long do DIY face masks last, and how should you store them?
Most people make too much mask at once and then wonder why their skin reacted badly three days later. Storage is where most homemade face mask routines fall apart.
Fresh masks made with perishable ingredients like avocado, yogurt, or egg white have a shelf life of 2 to 3 days when refrigerated. That is the outer limit, not a target. The shorter the time between mixing and application, the better the results and the lower the contamination risk.
- Use spatulas, not fingers. Dipping fingers into a stored mask introduces bacteria from your skin directly into the batch. Clean spatulas and dedicated mask spoons extend usable shelf life and prevent cross-contamination between uses.
- Press plastic wrap directly onto the mask surface. Oxidation is the primary reason avocado-based masks turn brown and lose potency. Pressing plastic wrap flush against the mask surface before sealing the container significantly slows oxidation.
- Freeze single-use portions. For larger batches, spoon the mask into an ice cube tray, cover with plastic wrap, and freeze. Thaw one cube per session in the refrigerator overnight. This method works well for avocado and banana-based masks.
- Watch for spoilage signs. Discard any mask that shows color changes beyond normal oxidation, an off smell, visible mold, or a change in texture. When in doubt, throw it out. Applying a contaminated mask to your face is a direct route to a skin infection.
Water-based natural masks without preservatives grow bacteria rapidly, even under refrigeration. This is not a reason to add synthetic preservatives to your homemade formula. It is a reason to make smaller batches more frequently.
Common mistakes that damage your skin barrier
The biggest misconception in natural skincare is that “natural” automatically means “safe.” That belief leads to some of the most common and avoidable skin problems in DIY skincare.
“Natural does not equal non-irritating. Essential oils and citrus ingredients can cause dermatitis or photosensitivity when misused, regardless of how clean or organic the source is.” — Trophyskin dermatology guidance
- Skipping the patch test. Even oatmeal, one of the gentlest ingredients available, can trigger a reaction in people with grain sensitivities. Never skip this step.
- Using undiluted essential oils. Lavender, tea tree, and peppermint oils are popular in natural skin care recipes, but applying them directly to skin without a carrier oil causes chemical burns and sensitization over time.
- Over-exfoliating. Using enzyme-based masks like papaya more than twice a week damages the skin barrier. A compromised barrier leads to increased sensitivity, dryness, and breakouts, which is the opposite of the goal.
- Ignoring seasonal shifts. Lighter formulations are better in spring and summer when humidity is higher and pores are more prone to clogging. A heavy avocado mask that works perfectly in January may trigger breakouts in July.
- Applying citrus directly to skin before sun exposure. Lemon juice and grapefruit extract cause photosensitivity reactions when skin is exposed to UV light shortly after application. If you use citrus ingredients, apply masks in the evening only.
A DIY face mask for acne that uses tea tree oil without dilution is one of the most common causes of contact dermatitis among people new to homemade skincare. The fix is simple: dilute every essential oil to 1% or less in a carrier oil before adding it to any mask formula.
Key takeaways
The most effective DIY natural face masks match specific ingredients to your skin type, follow strict preparation hygiene, and are stored for no more than 2 to 3 days refrigerated.
| Point | Details |
|---|---|
| Match ingredients to skin type | Clay suits oily skin; avocado and yogurt suit dry skin; oatmeal suits sensitive skin. |
| Avoid metal tools with clay | Metal reacts with clay and reduces its effectiveness; use glass or ceramic instead. |
| Refrigerate and discard promptly | Fresh masks last 2 to 3 days refrigerated; discard sooner if you notice any spoilage. |
| Patch test every new formula | Apply to your wrist 24 hours before full facial use to catch reactions early. |
| Adjust for the season | Switch to lighter, oil-free formulas in spring and summer to prevent pore congestion. |
Why I think most people are doing natural masks backward
Most skincare content tells you to find a recipe you like and stick with it. I think that is exactly the wrong approach. Your skin is not the same in February as it is in August, and it is not the same at 25 as it is at 40. Treating it like a fixed problem with a fixed solution is why so many people cycle through recipes without ever getting consistent results.
What actually works is treating your skin like a system you are learning, not a problem you are solving once. I have found that rotating between two or three formulas based on what my skin is doing right now, rather than what it did last month, produces far better outcomes than any single “best” recipe. A clay mask one week, an oatmeal soothe the next, a papaya brightener when things look dull.
The other thing most articles skip is the hygiene side of preparation. The cleanest ingredients in the world do not help if you are mixing them in a bowl you just rinsed with dish soap, or scooping them out with your fingers every time. Jermaphobi4me’s whole philosophy is that clean environments and clean practices are the foundation of healthy skin, and that applies directly to how you make a face mask at home. The recipe is only half the equation.
— Gimmi
Take your natural skincare routine further with Jermaphobi4me

A great homemade face mask is only as good as the routine around it. Jermaphobi4me’s top-selling natural skincare products are formulated to complement the clean, non-toxic approach you are already taking with your DIY masks. The Jermaphobi’s Hand Hygiene Starter Kit keeps your hands clean before you touch your face or mix your next batch, which directly reduces contamination risk. For gentle post-mask cleansing, the Maiden For Her plant-based wipes are pH-balanced and eco-friendly, making them a natural fit for skin that you are already treating with care. Clean skin starts with clean habits.
FAQ
What is a DIY natural face mask?
A DIY natural face mask is a homemade skincare treatment made from food-grade or organic ingredients like honey, clay, avocado, or oatmeal. It is applied to the face for 10 to 20 minutes to address specific skin concerns without synthetic chemicals.
How often should you use a homemade face mask?
Apply a homemade face mask two to three times per week. Using masks more frequently than that, especially exfoliating types, can weaken the skin barrier and increase sensitivity.
Can natural ingredients cause skin irritation?
Yes. Natural does not mean non-irritating. Essential oils, citrus, and concentrated plant enzymes can cause dermatitis or photosensitivity reactions. Always patch test any new formula on your wrist before applying it to your face.
How long does a DIY face mask last in the fridge?
Fresh masks made with perishable ingredients like avocado or yogurt last 2 to 3 days when refrigerated in a sealed container. Use clean spatulas to scoop each portion and discard immediately if you notice any off smell or color change.
What is the best DIY face mask for acne?
A mask combining bentonite clay, raw honey, and a small amount of water is one of the most effective options for acne-prone skin. Clay draws out excess oil, while honey provides antibacterial action without drying the skin.
Recommended
- Types of Chemical-Free Body Wash: Your 2026 Guide – Gimmi Vitality Products dba Jermacilin Store
- What Is Double Cleansing? Your Skin-Clearing Guide – Gimmi Vitality Products dba Jermacilin Store
- Maiden For Her (Plant-Based, pH Balanced, Eco-Friendly) Wet Wipes – Gimmi Vitality Products dba Jermacilin Store
- How to Disinfect Your Kitchen Without Harsh Bleach – Gimmi Vitality Products dba Jermacilin Store